How To Create Your Own Custom GPT With Bubble & OpenAI (Complete Guide)
9th of January, 2025
Creating a custom GPT model using Bubble and OpenAI allows you to build a dynamic application with tailored AI responses, leveraging the power of OpenAI’s APIs. This guide walks you through each step, from setting up your Bubble environment to integrating OpenAI APIs and designing an intuitive user interface. By the end of this blog, you’ll have the tools to create an app like “Professor GPT,” a custom chatbot with academic expertise.
Throughout this guide you’ll learn:
1. Introduction to Custom GPTs and the Tools Needed
2. Setting Up the User Interface (UI) in Bubble
3. Connecting Bubble with OpenAI via API
4. Configuring API Calls with OpenAI
5. Creating Workflows in Bubble
6. Customizing the System Prompt Dynamically
7. Saving and Displaying Messages
1. Introduction to Custom GPTs and the Tools Needed
A custom GPT model enables you to design a chatbot or AI assistant with unique behaviors and functions. This can include:
- Responding to users in specific styles or tones.
- Acting as a domain expert in particular fields.
- Handling dynamic conversations with user-controlled customization.
It allows developers to fine-tune AI responses based on specific parameters. For example, you can program the AI to respond like a history professor. This flexibility makes it ideal for tailored applications. By the end of this blog, you’ll have the tools to create an app like “Professor GPT,” a custom chatbot with academic expertise.

The tools you’ll need for this guide include:
- Bubble: A no-code platform for building web applications.
- OpenAI: For accessing GPT models and other AI services via API.
- Notion (Optional): To create and follow checklists during the process.
2. Setting Up the User Interface (UI) in Bubble
Head over to the Bubble editor. The Design of the UI involves creating input fields for user prompts and a chat interface to display responses. Here’s how:
- Add an Input Field for users to type their questions.
- Create a Submit Button to trigger workflows.
- Use a Repeating Group to display the conversation history.

Bubble’s intuitive drag-and-drop tools make it simple to align and style these elements.
3. Connecting Bubble with OpenAI via API
For those unfamiliar, an API is essentially a tool that connects two web apps, online portals, or services. Bubble makes it super easy to facilitate this connection, requiring only minimal code. Fortunately, OpenAI’s documentation provides detailed guidance, making the process a breeze.
Add the OpenAI connector to the Bubble app:
- In the Bubble editor, click the Plugins tab (the power plug icon).
- Click “Add Plugins.”
- Install the Bubble API Connector (usually the first result).
- Once installed, you’ll see it in your plugin list.
This API Connector allows us to connect Bubble to any web API, including OpenAI’s services.

The first step is to establish an API connection between Bubble and OpenAI. Follow these steps:
- Open the Bubble editor and navigate to the Plugins section.
- Install the API Connector Plugin by clicking “Add Plugins” and searching for it.
- Set up an API connection:
- Click “Add another API.”
- Set the API Name as “OpenAI” and select the authentication method as “Private key in header” from the dropdown menu.
- Set the Key name as Authorization header and Key value as “Bearer $OPENAI_API_KEY“.
Bubble recreates this header code internally so that when your app calls OpenAI, it sends the header in the correct format. You still need to replace the placeholder text “Bearer $OPENAI_OR_API_KEY” with your actual secret API key from OpenAI. Refer to OpenAI’s documentation for specific configurations.
Private Key Setup
Ensure the connection is secure by using a private key to keep your connection secure and prevent malicious access. The API connection will allow your Bubble app to interact with any and all OpenAI services such as GPT or DALL·E.
- Go to platform.openai.com/account/api-keys (or the relevant page in your OpenAI dashboard).
- Create a new secret key by clicking the “+” button.
- Name your key (for example, “Professor GPT”).
- Keep permissions as default or modify as needed.
- Copy the generated key (a long string of text and numbers)
- Replace everything from the dollar sign up to ‘key’ with my actual API key.
- You must keep the word “Bearer” before your secret key in the Key Value field. “Bearer” confirms you’re the bearer of this key and helps authenticate your connection securely.
4. Configuring API Calls with OpenAI
Next, you’ll configure the API call to OpenAI within Bubble. In the API Connector, under the Name: “API Call” section, click expand to begin adding the details for your request. So, follow these steps:
- Set the Name as “Custom GPT” and for Use as Choose “Action”.
- Set the Data type to “JSON” and set the method to POST instead of “GET”.
- Next to POST, enter the API endpoint: https://api.openai.com/v1/chat/completions.
- Next under Headers, set the fields: Key as “content-type”and Value as “application/json”.
- To define the JSON parameters, including the model (e.g., GPT-4) and messages, copy and paste the below code into the JSON body section.
Code for JSON Body for testing:
{

  "model": "gpt-3.5-turbo",

  "messages": [

    { "role": "system", "content": "You are a helpful assistant who rhymes in all their responses." },

    { "role": "user", "content": "Hello! How are you today" }

  ]

}
Test the API call to ensure it responds correctly before integrating it into workflows.
Creating a Dynamic System Message
In Bubble’s JSON body, replace the static system content with something like the following code. The angle brackets (<>) and a key name (e.g., custom-GPT) tell Bubble you want to insert a dynamic value.
Code for JSON Body with dynamic values:
{

  "model": "gpt-3.5-turbo",

  "messages": [

    { "role": "system", "content": "<custom-GPT>" },

    { "role": "user", "content": "Hello! How are you today" }

  ]

}
Provide a Test Value
- Bubble automatically creates a field for customGPT.
- Enter a sample system prompt (e.g., “You are a helpful assistant who likes to rhyme.”).
- Uncheck “Private” if you want app users to see or modify this system message.
Reinitialize the Call
- Check the raw data again.
- The assistant response should reflect the custom prompt.
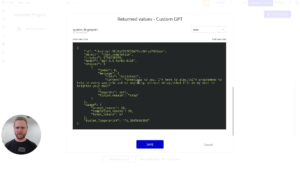
Static vs. dynamic prompts:
- Static: The system message is ‘locked in’ the API call.
- Dynamic: We create a key (e.g., <<customGPT>>) so it can be changed from the front end
5. Creating Workflows in Bubble
Workflows control the functionality of your app. To integrate the OpenAI API call:
- Set up a workflow triggered by the Submit Button.
- Add a step to send the user’s message to OpenAI.
- Capture the response and display it in the Repeating Group.

Use Bubble’s native database to store messages for dynamic interaction.
6. Customizing the System Prompt Dynamically
A powerful feature of GPT is the ability to customize system prompts dynamically:
- Create a Settings Page in Bubble where users can input their desired system prompt in this way:
- Clone the index (or main) page to keep the same header and styling.
- Add a Multi-Line Input to show/edit Current User’s custom-GPT.
- Save button when clicked: “Make changes to Current User” → “custom-GPT” will store multi-line input.
- Testing with a Demo User: Enter a custom system prompt, and watch the chat respond accordingly.
- Save this input in the database as a custom field.
- Pass this dynamic value to the system role in the API call.
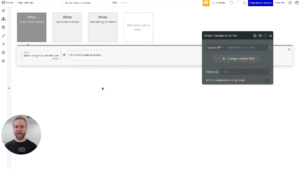
This allows users to control the behavior and tone of the AI.
7. Saving and Displaying Messages
To create a seamless chat experience:
- Store each user message and AI response in the database.
- Use JSON-safe formatting to avoid errors when sending data to OpenAI.
- Display conversation history in chronological order within the Repeating Group.
Adding the Assistant’s Response to the Chat
- After the API call, “Create a new Chat” with
Sender = assistantandMessage = Result of Step 2’s choices:first item:message:content. - Context Note: You must also send the user’s question to the API call’s user role—otherwise, the assistant has no idea what the user just asked!
Understanding Chat Completions & Context
- In Chat Completions, every new user message depends on the entire conversation’s history.
- You must pass all prior messages (system + user + assistant) for the AI to remember context.
Making the Entire JSON Body Dynamic
- Replace your original static JSON with a single placeholder (e.g.,
"<chat>") for the messages array. - Then, from Bubble, build a dynamic JSON string containing all previous messages.
Final Steps: JSON-Safe Formatting, Conversation History, and Testing
- Ensuring JSON-Safe Formatting: Bubble’s
:formatted as JSON-safehelps escape problematic characters (quotes, newlines). - Saving the Assistant’s JSON Response
- You might store the raw JSON in the database if needed.
- Only extract the
choices:first item:message:contentfor display in the chat.
- Verifying Conversation Context
- Try follow-up questions like “Where was he born?”
- The assistant should use context if you’re sending the entire conversation in each API call.
- Building the Complete Conversation Array
- Gather all message entries (system, user, assistant) from your database.
- Sort them by creation time, and join them with commas to form a valid JSON array.
- Handling JSON Errors
- JSON is sensitive: missing commas, extra quotes, or unescaped newlines can break your request.
- Always check for correct brackets, quotation marks, and the
:formatted as JSON-safefunction.
8. Testing and Refining Your Application
Finally, test your app to ensure all features work as intended:
- Test different system prompts to confirm they affect responses as expected.
- Check that the UI updates dynamically after each interaction.
- Debug errors by reviewing API call logs and workflow configurations.

Conclusion
By following this guide, you can create a fully functional custom GPT app powered by Bubble and OpenAI. This application can be adapted for various use cases, from education to entertainment, offering personalized AI interactions. With Bubble’s no-code tools and OpenAI’s robust API, the possibilities are endless.


