


How To Build An AI-Powered Survey With No-Code
2nd of June, 2025
Using this guide, you’ll learn how to create an intelligent feedback collection system that dynamically adjusts questions based on user responses using ChatGPT’s API. This interactive approach allows you to gather deeper insights and more meaningful feedback compared to traditional static forms.
We’ll walk through building a smart feedback form that uses ChatGPT to analyze responses in real-time and ask relevant follow-up questions, helping you understand the root causes of user issues and gather actionable insights.
Throughout this guide you’ll learn how to:
1 – Set Up Your Database Structure
In your Bubble project, create a new page that will hold the user interface for our feedback form.
Create the Feedback Data Type
Let’s first create the individual feedback entries:
- Navigate to the Data tab in your Bubble editor
- Create a data type called Feedback
- Add these fields:
- JSON (text) – Stores the conversation history
- Question (text) – The question asked by ChatGPT
- User Response (text) – The user’s answer
Create the Survey Data Type
First, you’ll need to create two data types to store your feedback sessions:
- Create a new data type called Survey
- Add a field called feedbacks with type Feedback (make this a list)
2 – Design the User Interface
Set Up the Page Layout
Create a centered container for your feedback form:
- Head back to the Design tab to view the empty page we’ve created earlier.
- Add a Header component from the components library
- Set the container layout to Column.
- We’ll also add in a custom logo to replace the placeholder image in our component.
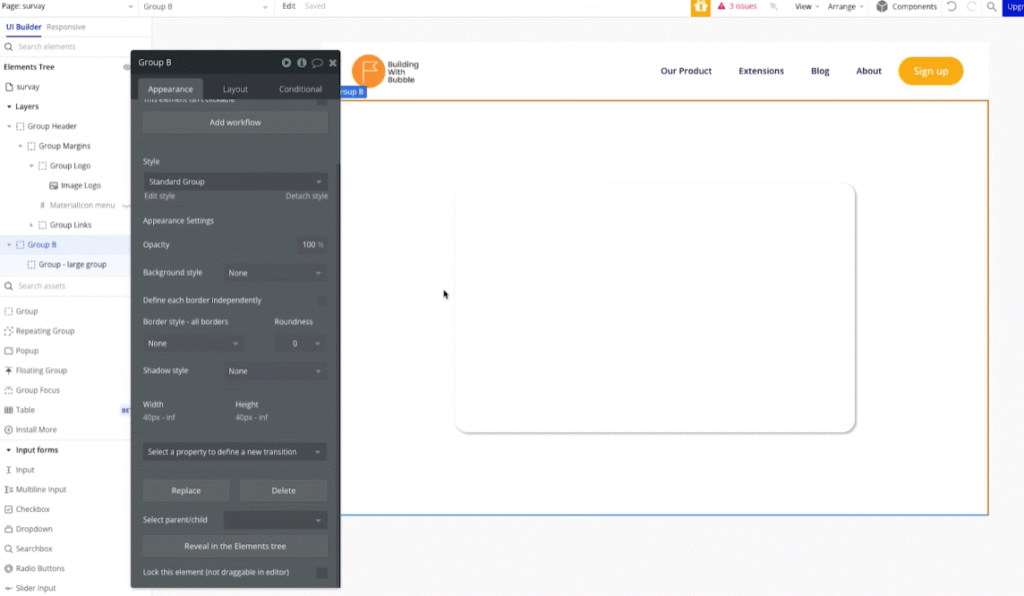
- Add a new Group element to the page.
- Untick the “Fit width to content” option
- Container alignment: Center
- Add a second group to the page. We’ll label this group our “large group”.
- Minimum width: 60%
- Minimum height: 60%
- Set roundness to 20
- Add shadow style: Outset
- Remove any visible borders
Create Custom States for Navigation
You’ll use Bubble custom states to switch between different screens:
- Select the larger group and click the i icon (Element inspector) to add a new custom state.
- Add the following custom state:
- page_number (number) – Default value: 1
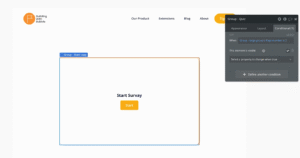
Build the Start Screen (Page 1)
Let’s add more groups to create multiple screens.
Create the initial screen users see:
-
- Add a Group inside your main container
- Name it Start
- Uncheck the option “This element is visible on page load” and check “Collapse when hidden”
- Set visibility condition: When Large Group’s page_number is 1
- Add:
- Text element: “Start Survey”
- Button element: Label “Start”
- Center align all elements
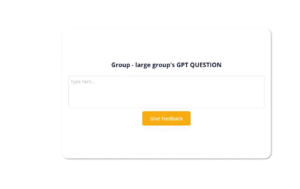
Build the Quiz Screen (Page 2)
Build the interactive question-answer interface:
- Copy the Start group and rename it Quiz
- Change visibility condition: When Large Group’s page_number is 2
- Replace the static text with “Start Survey” with dynamic content:
- Insert dynamic data: Large Group’s gpt_question
- Add a Multiline Input element for user responses
- Change the button label to Give Feedback
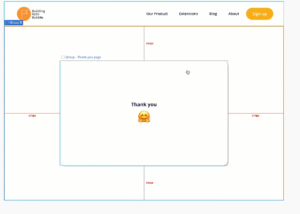
Build the Thank You Screen (Page 3)
Create the completion screen:
- Copy the Quiz group and rename it Thank You
- Change visibility condition: When Large Group’s page_number is 3
- Remove the input and button elements
- Update the text to: “Thank you! 😊”
3 – Configure the OpenAI API
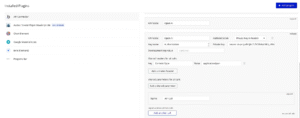
Install the API Connector Plugin
If you have not installed the API connector plugin yet, here’s what you need to do:
- Go to the Plugins tab
- Search for API Connector
- Click Install
Set Up API Authentication
Configure your OpenAI connection:
- In the API Connector, add a new API called Open AI
- Set authentication to Private key in header
- To access your API key, log in to your OpenAI account and access the API keys menu in the dashboard. Click Create new secret key and copy the generated key.
- Add your API key: Bearer YOUR_API_KEY
- Add shared header:
- Key: Content-Type
- Value: application/json
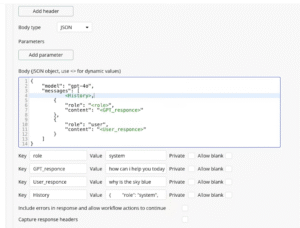
Create the Completions Call
Import the ChatGPT completions endpoint:
- Click Import another call from cURL
- Paste the cURL command from OpenAI’s API documentation
- Name it completions_call
- Set as Action (not Data)
- Make these fields dynamic by wrapping the indicated fields in “<>”:
- <role>
- <gpt_response>
- <user_response>
- <history>
- Add values to each of these dynamic keys.
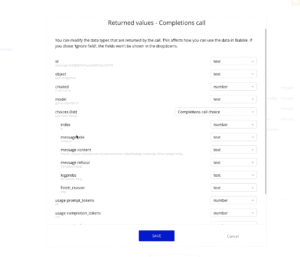
After filling in the dynamic values, we can test our completion call by clicking Initialize call.
If successful, you should see a pop-up like this:
4 – Create the Workflows
Next, we’ll need to create the actual workflows that connect our interface with the OpenAI API service.
Create the Start Button Workflow
Set up the initial conversation. Click the Start button and select Add workflow in the Appearance tab.
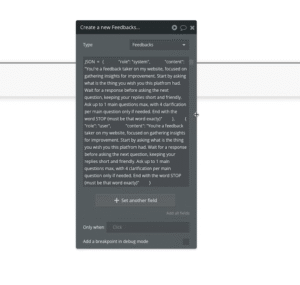
Step 1
Create a new Feedback object. The JSON field should be a JSON text that describes how the AI will respond to the user. Set the role as “System”, then add further instructions that dictate the chatbot’s behavior.
In our example, we’ll write a detailed prompt that instructs the AI to behave as a feedback taker, which first asks the user for specific feedback.
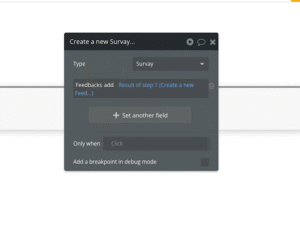
Step 2
Create a new Survey object (where the Feedbacks field is the result of Step 1)
Step 3
Next, create a new action that calls the Completions API call we’ve set up earlier.
Copy the same data for the role, GPT_response, and user_response fields.
For the history field, set the data to pull from the previous step’s Feedback’s JSON field.
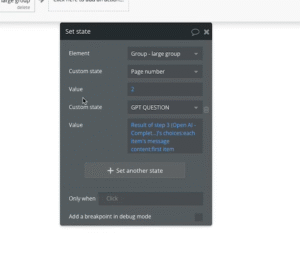
Step 4
Create a new action that sets the state of an element. We’ll then set the Page number custom state to a value of 2. Next, set the Question custom state to the first item in Step 3’s list of choices
Set up Feedback Button Workflow
Click the Give feedback button and add a new workflow
Step 1
Create a new Feedback object.
- Modify the JSON text to accommodate an Assistant AI message.
- Set the role to “assistant”
- Set the content to the large group’s GPT Question value
- Lastly, set the user response: to be the multi-line input element’s value.
Step 2
Make changes to Survey:
- Thing to change: Large Group’s survey
- Feedbacks add: Result of Step 1
Step 3
Reset Multiline Input to allow the user to submit another response later on.
Step 4
We’ll create another call to the OpenAI Completions API.
- Role: assistant
- GPT Response: Large Group’s gpt_question
- User Response: Multiline Input’s value
- History: Large Group’s survey’s feedbacks:each item’s json
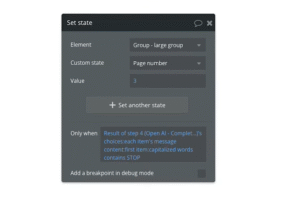
Step 5
Set the state of the large group’s page number to 3 only when the result from step 4 contains STOP.
Step 6
Set the GPT Question value to the text of the next question to ask.
Conclusion
You’ve now built an intelligent feedback collection system that adapts to user responses in real-time. This interactive approach will help you gather more meaningful insights than traditional static forms.
For more advanced Bubble techniques, check out our guide on building a fine-tuned OpenAI chatbot in Bubble!