


How To Build A View Counter In Bubble.io (Complete Guide)
4th of August, 2025
View counters are essential for tracking user engagement in any social media or content-based application. By implementing your very own view counter, you can measure how many times users have viewed specific content, providing valuable insights into user behavior and content performance.
In this Bubble guide, you’ll learn how to create a fully functional view or impression counter that tracks every time a user views a particular page or piece of content in your Bubble app. We’ll cover setting up the visual design, configuring database fields, installing the required plugins, and creating the workflows that power the counting mechanism.
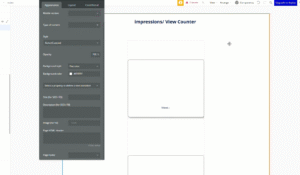
1. Set Up the Basic Page Design
Create the Page Header
Let’s start by creating a clean header for your impression counter page:
- Navigate to your page in the Design tab
- Add a Text element for the page heading
- Set the text to “Impressions / View Counter”
- In the Layout tab, center the text horizontally
- Make the text bold and increase the font size
- Add padding to the top for proper spacing
Add the Repeating Group Container
Next, you’ll need to create a repeating group to display multiple content items:
- From the Containers section, drag a Repeating Group onto your page
- Position this element in the center of the page
- In the Layout tab for the repeating group, configure the following settings:
- Minimum width: 400px (adjust based on your app’s styling needs)
- Fit width to content: Enabled
- Rows: 4
- Columns: 1
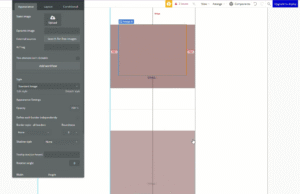
Design Individual Content Cells
Each item in your repeating group needs proper structure:
- Drag a Group element into the first cell of the repeating group from earlier
- Name this group “Group View” for easy reference later
- Set the group’s background color temporarily to help visualize the layout
- Configure the group dimensions:
- Minimum width: 300px
- Minimum height: 300px
- Add 100px margin on the top and bottom to create spacing between element
Inside your Group View, add the following visual elements:
- Image element: Drag an image into the group and center it
- Text element: Add text below the image and set it to display “views”
Style the Design
Improve the visual appearance of your content cards:
- Remove separators: In the repeating group’s Appearance tab, set separators to None
- Style the group: Add a solid border to Group View
- Add some roundness to create rounded corners (a value of 10 looks good here)
- Apply shadow: Add an outset shadow to each card
- Set background: Change the group’s background back to white to get a nice, clean card element
2. Install the Viewport Detector Plugin
The view counter functionality requires a specific plugin to detect when content enters and exits the user’s viewport.
Add the Plugin
- Navigate to the Plugins tab in your Bubble editor
- Click Add plugins and search for “viewport detector“
- Install the Viewport Detector plugin
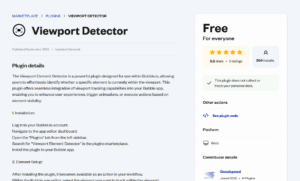
The Viewport Detector plugin provides two key events:
- Viewport detect enter screen: Triggered when an element becomes visible
- Viewport detect exit screen: Triggered when an element leaves the viewport
We’ll use the exit screen event to count impressions, ensuring users have actually viewed the content before scrolling away.
3. Configure Database Structure
Create the Posts Data Type
Set up your database to store post information and view counts:
- Go to the Data tab
- Create a new Data type called “Posts“
- Add the following fields:
- Image: Field type set to Image
- View count: Field type set to Number
Feel free to add more fields for this data type depending on the type of data you want to store for each post.
Add Sample Data
Next, let’s create some test data to work with:
- Navigate to App data > All Posts
- Click New entry
- Upload sample images for testing
- To test the app, we can create at least 3 entries to enable the scrolling functionality
- Leave the view count field empty (it will default to 0)
4. Connect Data to Visual Elements
Now that we have the basics set up, let’s set up the workflows and configure our repeating groups to display our test data.
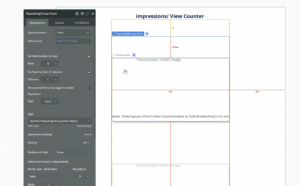
Configure the Repeating Group Data Source
Link your repeating group to the database:
- Select the Repeating Group
- In the Appearance tab:
- Type of content: Posts
- Data source: Set this to “Search for Posts” (no constraints needed)
Next, configure each element within the repeating group:
- Group View:
- Type of content: Posts
- Data source: Current cell’s Posts
- Image element:
- Dynamic image: Parent group’s Posts’s Image
- Text element:
- Insert Dynamic data: Parent group’s Post’s View count
- Format as: Number
- Default when empty: 0
- Add the text ” views” after the dynamic content
5. Add the Viewport Detector Element
Place the Detector
The placement of the viewport detector is crucial for proper functionality:
- From the Visual elements panel on the left, drag the Viewport Detector into your page
- The Viewport Detector element must be placed inside the Group View, not in the repeating group itself
- The detector must be within the same group that contains the image
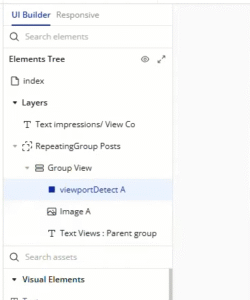
This placement ensures that each post can be tracked separately as users scroll through the repeating group.
6. Create the View Counting Workflow
Set Up the Trigger Event
Create the workflow that increments the view counter:
- Navigate to the Workflow tab
- Create a new event and select Elements > A viewport detect exits screen
- Choose your Viewport Detector element
Next, we’ll configure the action that updates the view count:
- Add a new action to be triggered by the event above. This will be the first step in our workflow.
- Select Data (Things) > Make changes to a thing
- Configure the action:
- Thing to change: Parent group’s Post
- View count: Parent group’s Post’s View count + 1
This workflow triggers whenever a post exits the user’s viewport, incrementing the view count by 1.
7. Test Your View Counter
Preview the Functionality
Test your implementation:
- Click Preview to see your app in action
- Scroll through the repeating group content
- Watch as view counts increment when images exit the viewport
- Verify that each post maintains its count
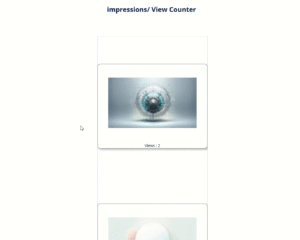
The counter should increase by 1 each time you scroll past an image, demonstrating that the impression tracking is working correctly.
Conclusion
You now have a fully functional view counter system in your Bubble app that tracks user engagement with your content. This impression counter provides valuable analytics data and can be adapted for various use cases, including social media posts, articles, product listings, or any content where engagement tracking is important.
If you’re interested in building robust applications in the Bubble editor, look into our complete guide on using reusable elements!